
 (6) ✔️ 1")


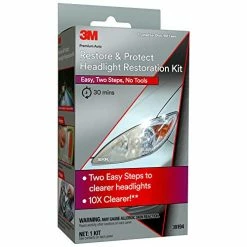


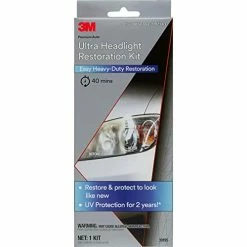
Best reviews of ???? 3M Auto Restore And Protect Headlight Restoration Kit, Clearer Headlights In 2 Easy Steps, 39194 ✨
Original price was: $9.98.$6.99Current price is: $6.99.
- Fast, friendly, always here to help.
- Quality products, fair prices.
- fast shipping
- Secure Shopping with Safe Payments

Scotch Delicate Surface Painter’s Tape is great for surfaces that require a little extra care such as wood floors, wallpaper, cabinets, painted drywall, and freshly painted walls* (*painted at least 24 hours ago). This delicate surface tape with gentle adhesive can stay on surfaces for up to 60 days and then removes easily without leaving any sticky residue behind. This tape features Edge-Lock Technology that seals out paint to deliver sharp paint lines and clean removal for your more sensitive projects, including accent walls, decorative stripes and patterns. Whether you’re protecting your hardwood floors from paint splatter or going all out with a decorative mural, rely on Scotch Delicate Surface Painter’s Tape for a professional look that’s easy on your surfaces.
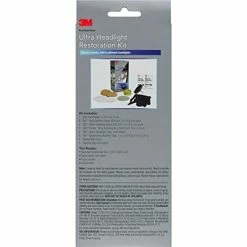
- KIT INCLUDES: 1 – 3M Trizact Refining Disc 1000 grit, 3 in/7.6 cm, 1 – 3M Trizact Refining Disc 3000 grit, 3 in/7.6 cm, 2 – 3M Quick Headlight Clear Coat Wipes, 1 – Foam Pad with 3M Hookit Attachment, 3 in/7.6 cm, 1 – Disposable Glove
- For use on plastic lenses – headlights, taillights, fog lights, directional lights and more
- 3M abrasive technology removes yellowing and buildup without damaging plastic lens surface
- Easy to use – choose a kit with no tools required, or for use with a common household drill
- Save hundreds vs. replacing headlight lenses
- For industrial/occupational use only. Not for consumer sale or use.
8 reviews for Best reviews of ???? 3M Auto Restore And Protect Headlight Restoration Kit, Clearer Headlights In 2 Easy Steps, 39194 ✨
Add a review
Related products


alessandrina –
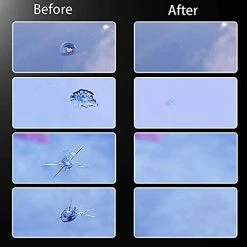
I was a little nervous to use the kit because of some mixed reviews, but I was impressed by the results on my 15 year old headlights. The left picture is before starting the process; the right is after completing all the steps.I made sure to carefully follow the instructions. My headlights were not too yellowed and pretty evenly hazy, so I just wet-sanded with the 1000 grit until the coating/residue coming off was no longer yellow, and then buffed with the 3000 grit for twice the time of the 1000.I thought I had messed up an area one of the lights with the first UV wipe, and I was tempted to try to touch up the first pass, but the instructions say not to, so I waited and tried to be more careful with the second pass. It did turn out crystal clear – no streaks at all.It took about an hour to do both headlights from start to finish, including taping.It has only been about a week, but the lights still look like the day I restored them, even after a rain.I will definitely purchase again if/when necessary.
Tammy W. –
I was skeptical, but rather than spending hundreds to replace hazy, yellowing headlights, I decided to give 3M Auto Restore a try. Instructions were easy to follow and the kit came with everything you need. Anyone can do this. The headlights cleaned up really well. They are crystal clear and look new again! I can’t really rate longevity yet, as I only refinished them about a week ago. However, if they need a touch up down the line, I’ll buy another kit. Just as a point of reference, my headlights are in good shape (no cracks, pitting or surface issues). I have a medium severity, yellowing haze on the surface. If your headlights are in really bad shape, 3M has a stronger kit you should use.
B. L –
My car is 16 years old and these are the original untouched headlights. Gave this product a shot and it was extremely easy to use and the results as pictured are far better than expected.I don’t know how long it will last, but the short time spent, ease of applying it, and factored in with the affordable price I would buy again if necessary.
Rebekah Gaus –
Hello there! ????Recently I have been having trouble with setting on dark, country roads. I thought it was my car’s lights needing to be replaced, even though I recently did that.Someone looked at my lights and told me they think I just need my lenses restored. They mentioned it would be around $100 at an auto store for them to do it. I decided to at least attempt doing it myself first, which I think turned out alright. The product I used is a 3M Headlight Restoration Kit from Amazon.
Chris –
This is a very good product, honestly would expect to pay $20 and would because of how well it works so the low price is an added bonus. The emphasis on the scrubbing with different grit pads makes the perfect surface for the coating to go on and they really look like new!
T. E. Antis –
The Internet is filled with videos and tips for home-brewed concoctions that polish your headlights. I’m sure some of them work well. I opted for this inexpensive, everything-in-one-package kit from 3M that promised to return my foggy headlights to pristine condition without a lot of trouble and effort on my part.It works. It took me less than an hour to step through the process on both headlamps and the results were fantastic. My advice is to read the directions and do it the way they suggest. Worked out fine for me, and for ten bucks, I figure I saved $30 or more over having the garage do it before my next inspection.
lisa –
If you’ve ever tried to clean your headlamps using the toothpaste hack, you know what it feels like to be let down. I used this product three weeks ago. Instructions could have been a little clearer. I ended up youtubing to watch a guy do this before starting myself. That film that’s there after you scrub is normal. It clears after you wipe with the towelette. Do not unfold the towelette. Do not press hard. You’re just laying on a nice even coat. Let dry a bit longer than the five to fifteen minutes directed. My second clear coat was when I noticed the drips from the first coat on one headlight. They weren’t bad, but they were there. I did the second coat with a lighter hand. The headlamps are still clear and look new.
SN –
Easy to do. My 2008 4 runner looks great but she had a bit of headlight jaundice. This product made them look about as close to new as you can get! 30 min or less. Great price too.