


-30%


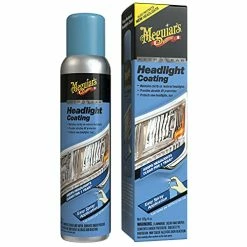


Hot Sale ⭐ G17804 Keep Clear Headlight ???? Coating, 1 Pack ????
Original price was: $13.78.$9.65Current price is: $9.65.
- Fast, friendly, always here to help.
- Quality products, fair prices.
- fast shipping
- Secure Shopping with Safe Payments

- Brand: Meguiar’s
- Color: Keep Clear
- Specific Uses For Product: Head Lights
- Vehicle Service Type: All
- Special Feature: Spray Bottle
- Position: Right
- Item Dimensions LxWxH: 7.75 x 1.86 x 1.86 inches
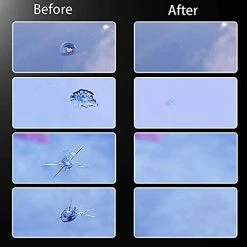
- CLEAR LIGHTS: Maintains clarity on new or restored headlights
- UNIQUE FORMULA: Proprietary headlight coating provides durable UV protection
- A NEW LOOK: Helps keep new headlights looking like new
- LASTS ALL YEAR LONG: Provides headlight clarity for up to a year
- EASY TO USE: Convenient aerosol spray application
| Style | Headlight Coating, Headlight Kit, Heavy Duty Headlight Kit |
|---|
7 reviews for Hot Sale ⭐ G17804 Keep Clear Headlight ???? Coating, 1 Pack ????
Add a review
Related products
-30%
Original price was: $24.99.$17.49Current price is: $17.49.
-30%
Original price was: $13.85.$9.70Current price is: $9.70.
-30%

Original price was: $20.99.$14.69Current price is: $14.69.
-30%
Original price was: $9.98.$6.99Current price is: $6.99.
-30%
Original price was: $19.99.$13.99Current price is: $13.99.
-30%
Original price was: $16.25.$11.38Current price is: $11.38.
-30%
Original price was: $16.99.$11.89Current price is: $11.89.
-30%
Original price was: $89.99.$62.99Current price is: $62.99.
Reamo –
After watching several product videos on this I decided to give it a try. The first thing I realized is that my headlights just didn’t have enough heavy fogging to justify using the “Cleaning Solution”. Check your headlights and decide if you really need this step; because of where my Truck is parked 90% of the time there was just a small area of fogging on each headlight. Might save you a couple bucks if you determine you don’t need the “Cleaning Solution”.Next, using the “Headlight Coating” does take a little more than just spraying it on. It’s worth taking the time to mask all around the headlights before application. The main thing I noticed is the can seemed to be over pressurized (or maybe cheap spray nozzle) and so just a quick application dispenses more than needed. I got a drip on one headlight; this is not noticeable with a casual glance but, it is there. Once you spray it’s there and can’t be removed so be careful when applying.But, I must say the Headlight Coating did make my headlights brighter and was worth using. Its only been a few weeks so I can’t say how long it will last.
Spencer T –
I work at a salvage yard and I restore and recondition headlights on a daily basis, this product is the bee’s knees, a god send product. It’s cheap, effective, and looks amazing. For extremely yellowed and oxidized headlights I use 240/280 grit DRY SAND until everything is uniform and the previous lens protection is removed entirely, then move up to finer grits, 400 grit DRY, 600 WET, 1000 WET, 1500 WET, 2000 WET, 3000 WET, between every sanding step MAKE SURE YOU CLEAN THE HEADLIGHT OFF THOUROUGHLY to ensure no residual debris is left behind. For headlights that are only yellowed with no oxidation, you can get away with starting at 1000 grit WET and move your way up to finer grits. At the very end of the 3000 grit wet sand, again making sure it’s completely clean and dry, Use a polishing compound to remove minor scratches and bring back a majority of the clarity, you will see it looks almost brand new! I personally use Meguiar’s 100 (aka “M100”). HOWEVER, you’re not done yet, now it’s time to mask off any plastics other than the lens, use a general degreaser to clean off the lens NO AMMONIA WHATSOEVER!! I prefer to use Dawn Dish Soap (it has degreasing qualities and is safe to work with) mixed with water (soapy water), spray some on a microfiber towel and clean off any oils or residue left by the compound. Now, using this product, spray moderately about 8-10 inches away. The directions say to follow up with a second coat, however this I do not do, A single well sprayed coat has superior clarity and gloss compared to a second coat. I’ve tried doing the second coat with countless headlights and they did not show as clean and clear as a single coat. Many people will keyboard warrior and question why I’m spraying on 3000 grit and only a single coat, but personally and professionally I have yet to have a single customer have issues with my reconditioned headlights even spanning over an entire year. I haven’t experienced any cracking or peeling using this reconditioning method and is way cheaper and more efficient than using say 2k clear coat. For anyone wanting to recondition headlights for personal even professional use, please try this product!Edited for deeper clarification of steps!
Bubba Lay –
I did a restoration on my car headlights as they were super damaged by the sun: yellowing and cracking. sanded, polished and applied this clear coat. Bam! back to shiny new. One downside to this, I changed out the bulb to LED projectors.Sadly, my headlights had the reflector in the middle for the bulb but my projector lamps were too long.Since headlights are super clear now, the reflector is visible where I pushed it down to be as flat as possible. It’s ok though. I’d rather have clarity, visibility than not being able to see driving at night.
Mr.Satisfaction –
Really works. I did a quicky and my lights look great compared to how they were. so much so people ask if i have new lights. literally could have done a better job if i took my time. I recommend taking about 7 min to rub out each headlight and do your best for steady and none runny coats.. do 3 or 4 coats if you have to and play it safe for it not to run but try to get full coverage area each time. You’ll be shocked at the results. Great product and I highly recommend.
Mark Rose –
What was difficult to understand was to take the basically scratch Sprite pad and scuff your plastic up where it came out hazy. It did not specify exactly that you were going to take the Shine off of the headlights. But after rereading it a few times and scuffing up the whole headlight. Wiped on them clean masking off the area with some 2-in blue tape spraying them twice like it said the headlights turned out fairly decent. We’ll see how it lasts as my wife washes her car through the car wash once a week
Gerald R. Arnold –
Have used similar products in the past and this is the best. If I used a drill pad and spent more time it could probably do even better. Since it only took 10-15 minutes total it is pretty impressive. I’ll try to update on longevity. The 07 Tundra lights are cheap to replace but you lose the vertical beam adjustment on the knock-offs so I’ll settle for polishing the originals as long as possible.
Tim Brown –
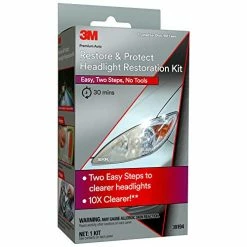
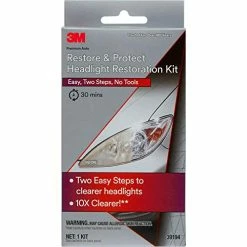
I purchased this alongside the 3M headlight restoration kit. The 3M kit had 500,800, and 8000, grit sanding disks. After removing all of the clearcoat with the 3M kit, I applied the Maguires clearcoat. The headlights came out like new. My wife didn’t believe that I would be able to restore those headlights but after watching several YouTube videos, I felt confident. I can’t speak for longevity as I only applied this a few weeks ago. I will update this review if the headlight acting fails