

) ???? 2")
-30%


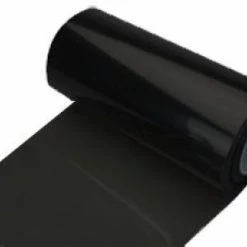


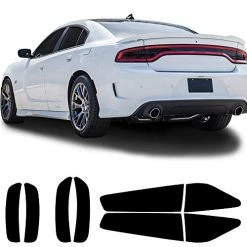
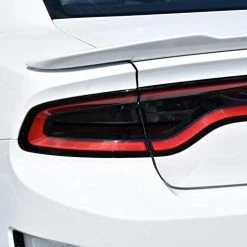
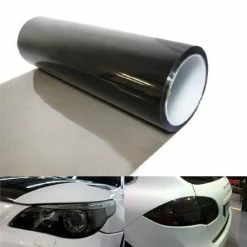
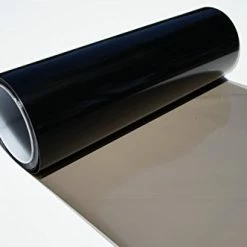
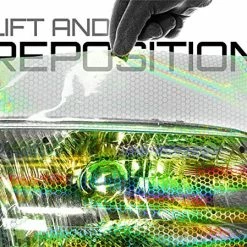
Cheap ⭐ Vinyl – 50% Dark Smoke Black-Out Vinyl Headlight Taillight Tints ????
Original price was: $7.99.$5.59Current price is: $5.59.
- Fast, friendly, always here to help.
- Quality products, fair prices.
- fast shipping
- Secure Shopping with Safe Payments

- Brand: ZEEZ
- Item Package Quantity: 1
- Color: Black
- Fit Type: Universal Fit
- Position: Top
- Color: 50% Dark Smoke Black-Out
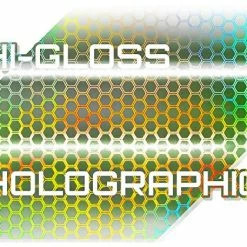
- Self-adhesive, peel and stick
- Stretchable with heat
- Water resistant
- Easy removal with no residual
5 reviews for Cheap ⭐ Vinyl – 50% Dark Smoke Black-Out Vinyl Headlight Taillight Tints ????
Add a review
Related products
-30%
Original price was: $20.99.$14.69Current price is: $14.69.
-30%
Original price was: $32.99.$23.09Current price is: $23.09.
-30%

Original price was: $16.99.$11.89Current price is: $11.89.
-30%
Original price was: $6.99.$4.89Current price is: $4.89.
-30%

Original price was: $27.99.$19.59Current price is: $19.59.
-30%

Original price was: $8.48.$5.94Current price is: $5.94.
-30%
Original price was: $18.99.$13.29Current price is: $13.29.
-30%
Original price was: $17.99.$12.59Current price is: $12.59.
John –
The product does as advertised, and uses a good 3M sealant, however, you’ll need to consider the dimensions of what they send you.One unit is a tightly rolled 12×24″ piece. This will work great if you have smaller taillights(make it simple, one square foot each), but if you wanna place this on a Cadillac, or old impala for instance, you will need multiple orders.One more thing to note: There is no spool in place, and the roll is held together by an adhesive instructions sticker. you can either cut it off, which will take about an inch of product away, or use lighter fluid/acetone to remove it. If you use the latter, be very careful not to get it on the edges of the sheet, as it can seep into the 3M adhesive- which you do not want.That being said, I do recommend this product. Just be mindful about how lenient your local police are about smoked lights.
Parasitologist –
The film was very dark. Which is what i wanted. I chose this because i didn’t feel like dealing with the smoke tint spray and getting messy.It does match perfect with my black car but it has bubbles. It feels as if it can come off easy, i don’t wanna try to peel anything off. Hopefully in a week or 2 the bubbles are gone. The light is still visible even in daytime which is awesome.3 out of 5 stars. i’ll put what I’m giving this item a star for.1st star – Blacked out look with good light visibility2nd star – Fast shipment and delivery3rd star – Inexpensive pricemissing stars for4th star – Installation5th star – QualityEveryone is different tho. Some ppl love the look of a light smoke, others like me, want that dark blacked out look. Like i mentioned above, the film seems like it is easy to peel off and it still has bubbles after 2 days of installation. I messed up the 1st time so i re ordered another set and had a professional do it. Overall it is a good item. I will purchase again unless i find something better.
Richard H. Martin –
I used it on the face of a too-bright LED clock Frigidaire 308-2408FR Wireless Curved Mirrored Extra Bright LED Thermometer If that’s similar to how you plan to use it, don’t let the many negative reviews you see here scare you off. The pigeon-English instructions that are stuck on the roll are terribly inadequate, and other instructions you can find on the web are not a lot more helpful. Try these instead:Be aware, as another reviewer has pointed out, that there is a clear layer on the outer surface of this stuff that needs to be removed (I did so before I applied it). Another trick: use scotch tape to stick to the clear plastic on both sides of the vinyl to initiate the process of pulling them off easily; “prying” them off with fingernails sucks.Despite what some reviewers imply I found this stuff quite forgiving, at least at room temperature. If you aren’t happy at first, you can immediately pull it back up from the surface you stuck it to (to eliminate a large trapped air bubble, for example) without leaving any residue of adhesive, and then stick it back down. The vinyl is just stiff enough to keep it from buckling or developing folds if your hand can’t keep it perfectly straight as you apply it to the curved dimension of your surface from one edge to the other. The vinyl (after the protective clear cover layer has been removed at least) trims very easily and cleanly with a sharp knife.There is a tendency for small bubbles to remain trapped under the vinyl. Using my fingers, or a flat plastic squeegee, I could persuade them to move a bit, but rarely far enough to reach the edge and disappear. Firm pressure shrinks them a bit, but never eliminates them completely. Don’t be dismayed, however. They weren’t noticeable from a few feet away, so I decided to live with them. A few days later the bubbles seemed to be a little smaller, and a few weeks later when I took a close look, by golly they had completely disappeared! The very thin vinyl must be slightly porous, eventually allowing trapped air molecules to exit.
cameron –
i really liked the tint color. looks very good. my only problem is that I drive an S550 mustang and those tail lights where a pain in the ass to tint. if you doing an S550 mustang or any other car with crazy tail lights and that is what your using it for take the lights out its so much easier and it you get bubbles in your tint you cant get out just wait for it to dry and urs a needle to pop them and a squeegee/ credit card to push it out.
Brit4764 –
I wanted to darken the lower light clusters on my 2018 Tesla Model S to give it a more stealthy “badass” look in keeping with the Midnight Silver color and the de-chromed trim. This film was easy to work with being quite thin and the adhesive side stuck quite easily and quickly. After cleaning the surface first and I then swabbed some 70% Isopropanol solution over the light cluster covers to remove any grease marks or fingerprints. You might see one or two bubbles, they should disappear if left out in the sun for a while. NOTE: A day after I did it, I noticed some new bubbles and a few creases showing which was puzzling until I realized there is a thin clear protective film on the front side of the tint. Duh! Remove that and it looks really nice, leaving a very smooth glossy almost mirror-like finish. Looks like factory fitted 🙂 The 50% works well. Darkens without being too dark. Well recommended.